 Fullersears
Looking to transform your space and give it a fresh new look? Look no further than DIY home projects. With a little creativity and some basic tools, you can easily add a personal touch to your home decor, upcycle old items, and even tackle easy home renovations. Whether you’re a seasoned DIYer or just getting started, there are endless possibilities to explore.
Get inspired with home decor crafts that allow you to express your unique style. From handmade wreaths to personalized wall art, these DIY projects can make a big impact on your space without breaking the bank. Plus, repurposing and upcycling ideas can help you breathe new life into old furniture and household items, adding both character and sustainability to your home.
Key Takeaways:
- DIY home projects offer a creative way to transform your space.
- Home decor crafts allow you to add a personal touch to your home.
- Upcycling ideas can give new life to old furniture and household items.
- Easy home renovation tips can help you refresh your space without major construction.
- Exploring DIY projects can be both fun and rewarding.
DIY Cabinet Makeover – Add a Fresh Look to Your Kitchen

Give your kitchen a fresh new look with a DIY cabinet makeover. A kitchen renovation doesn’t have to break the bank – a simple coat of paint can completely transform the space. The best part? You can do it yourself! By updating your kitchen cabinets, you can achieve a whole new aesthetic and breathe new life into your kitchen.
Transforming your kitchen cabinets allows you to express your personal style. You have the freedom to choose from a wide variety of colors and finishes that suit your taste and complement your kitchen decor. Whether you want a vibrant and bold statement or a more contemporary and timeless look, the possibilities are endless.
DIY cabinet makeovers are a cost-effective solution for homeowners looking to update their kitchens. Rather than investing in brand new cabinets, which can be expensive, painting your existing cabinets is a budget-friendly alternative. This DIY project allows you to achieve a high-end look without the high-end price tag.
When transforming your kitchen cabinets, preparation is key. Make sure to thoroughly clean and sand the cabinets to ensure optimal paint adhesion. Choose a high-quality paint and primer suitable for cabinets to achieve a smooth and durable finish. Don’t forget to remove the cabinet doors and hardware before starting the painting process for a seamless result.
Once you’ve prepped your cabinets, it’s time to get creative! Consider different color palettes that align with your kitchen decor ideas. If you’re aiming for a modern and sleek look, white cabinets can provide a clean and timeless appeal. On the other hand, if you want to inject some personality and vibrancy into your kitchen, bold colors like navy blue or emerald green can create a stunning focal point.
Don’t be afraid to experiment with unique finishes and techniques. Distressing your cabinets can add a charming vintage touch, while adding new hardware can enhance their overall appearance. Remember, this DIY project allows you to customize your cabinets to your exact preferences.
By tackling a DIY cabinet makeover, you can achieve a kitchen renovation that not only adds value to your home but also reflects your personal style. So, grab a paintbrush and get ready to transform your kitchen cabinets into a stunning focal point that will impress all who enter your kitchen.
Revamp Your Mailbox – Add Curb Appeal to Your Home

Make a great first impression with a mailbox makeover. Painting your mailbox with a fresh coat of paint can instantly boost your curb appeal. Whether you live in a ranch-style house or a craftsman-style home, a colorful mailbox can add personality to your front yard and make your home stand out.
When revamping your mailbox, consider choosing a color that complements your home’s exterior. A vibrant red or royal blue can create a striking contrast against a neutral-colored house, while a sleek black mailbox can lend an elegant touch to any style of home. The key is to choose a color that adds visual interest without overwhelming the overall aesthetic.
To achieve a professional-looking mailbox makeover, start by cleaning the surface thoroughly. Remove any dirt, rust, or peeling paint using sandpaper or a wire brush. Once the mailbox is clean and dry, apply a high-quality metal paint designed for exterior use. Be sure to use multiple thin coats for even coverage, allowing each coat to dry completely before applying the next. This will ensure a long-lasting and durable finish.
Top tips for a successful mailbox makeover:
- Choose a color that complements your home’s exterior
- Clean the surface thoroughly before painting
- Use a high-quality metal paint designed for exterior use
- Apply multiple thin coats for an even and durable finish
Once your mailbox is freshly painted, consider adding decorative elements to further enhance its appearance. You can attach address numbers, decorative decals, or even plant a small flower bed around the base of the mailbox for a pop of color. These small details can make a big difference in creating a welcoming and personalized front yard.
Revamping your mailbox is a simple and cost-effective way to add curb appeal to your home. With a fresh coat of paint and a few decorative touches, your mailbox can become a charming focal point that sets the tone for your entire property. So, why not give your mailbox the makeover it deserves and boost the overall aesthetic of your front yard?
Paint Your Front Door – Add Colorful Welcome to Your Home

Give your home a makeover by painting your front door. Changing the color of your front door can make a big impact on the overall look and feel of your home’s exterior. Whether you want to go bold with a vibrant color or keep it classic with a neutral shade, a fresh coat of paint can add personality and charm to your entryway.
A colorful front door can create a welcoming and inviting atmosphere for your guests. It sets the tone for the rest of your home and enhances curb appeal. Choose a color that complements the exterior of your house and adds a pop of personality to your entryway. A bright red, a sunny yellow, or a calming blue can instantly transform the appearance of your home.
Not only does painting your front door add a fresh look to your home, but it also allows you to express your personal style and make a statement. Whether you prefer a modern, sleek look or a more eclectic and whimsical design, your front door can be a canvas for your creativity.
When painting your front door, make sure to choose a high-quality exterior paint that can withstand various weather conditions. Prepare the surface by cleaning it thoroughly and removing any old paint or impurities. Apply primer if necessary to ensure better adhesion and durability of the new paint. Then, carefully apply the paint using a brush or roller, following the manufacturer’s instructions for drying times and number of coats.
Consider adding some DIY door decor to enhance the look of your front door even further. Hang a seasonal wreath, add a personalized doormat, or install decorative door hardware for a finishing touch. These small additions can make a big difference in creating a warm and inviting entryway.
So, why wait? Grab a paintbrush and give your front door a colorful makeover today. Add your personal touch, and watch as your home’s exterior transforms into a statement of style and charm.
Upcycle Old Furniture – Give New Life to Thrifted Finds

Don’t throw away your old furniture, give it a new life with an upcycling project. With a little bit of paint and creativity, you can transform a dated piece of furniture into a stylish statement piece. Whether it’s a dresser, nightstand, or bookshelf, repurposing old furniture is a cost-effective way to revamp your home decor.
Why Upcycling Old Furniture?
Upcycling old furniture is not only an eco-friendly choice but also a chance to showcase your personal style and creativity. Instead of buying new pieces, you can breathe new life into thrifted finds and create unique and personalized items for your home. Not only is it a sustainable option, but it also allows you to save money and add a touch of charm to your living space.
How to Upcycle Old Furniture:
- Preparation: Start by cleaning the furniture to remove any dirt or grime. If there are loose or damaged parts, repair them to ensure stability.
- Choose a Design: Decide on the look you want to achieve. Whether it’s a shabby chic distressed finish or a modern bold color, choose a paint color and any additional materials you’ll need.
- Painting: Apply a primer if necessary, then paint the furniture using a brush or roller. Consider using multiple coats for a smooth and even finish. Let each coat dry before applying the next one.
- Decorate and Customize: Add decorative elements such as stencils, decals, or hardware to enhance the furniture’s appearance. You can also experiment with different techniques like distressing, decoupage, or faux finishes for a unique touch.
- Protect and Seal: Once the paint is dry, protect your newly upcycled furniture by applying a clear sealant or wax. This will help preserve the finish and make it more durable.
- Showcase: Find the perfect place in your home to showcase your upcycled masterpiece. Whether it’s in the living room, bedroom, or hallway, display it proudly and enjoy the transformation.
Benefits of Upcycling Old Furniture:
Upcycling old furniture offers numerous benefits, including:
- Cost savings: Repurposing old furniture is a budget-friendly alternative to buying new pieces.
- Environmentally friendly: By upcycling, you reduce waste and contribute to a more sustainable lifestyle.
- Unique and personalized: Upcycled furniture adds character and reflects your individual style.
- Quality and durability: Older furniture is often sturdier and has better craftsmanship than modern mass-produced pieces.
- Customizable: With upcycling, you have the freedom to choose colors, finishes, and decorative elements that suit your taste.
So, before you toss that worn-out dresser or outdated coffee table, consider giving it a second chance through upcycling. With a little creativity and DIY spirit, you can transform old furniture into stunning pieces that breathe new life into your home. Upcycling is not only a great way to save money and reduce waste but also an opportunity to unleash your creativity and make your living space truly unique.
Organize Unused Corners with Shelving – Maximize Space and Storage

When it comes to maximizing storage in your home, don’t overlook those unused corners. Adding shelving to these areas can not only create more storage space but also help you declutter and organize your home more effectively. One of the most popular and stylish options for corner shelving is floating shelves.
Floating shelves are a simple yet efficient way to turn unused corners into functional storage areas. These shelves are mounted on the wall without any visible brackets, giving them a sleek and minimalistic look. Not only do they provide a practical storage solution, but they also add a decorative element to your walls.
Whether you want to display decorative items, books, or everyday essentials, floating shelves are versatile enough to accommodate your needs. You can install them in various rooms, including the living room, bedroom, kitchen, or even the bathroom. By utilizing the corners, you can maximize vertical space and keep your belongings within easy reach.
With corner shelving, you can declutter small spaces and make the most of every inch of your home. These shelves allow you to keep frequently used items organized and easily accessible, freeing up valuable countertop or floor space.
Not only are floating shelves functional, but they also offer an opportunity to get creative with your home decor. You can choose from a variety of materials, such as wood, metal, or glass, to match your existing interior design style. Additionally, you can experiment with arranging items on the shelves to create visually appealing displays.
So, why let those corners go to waste when you can turn them into stylish storage? Maximize space and storage in your home by considering corner shelving. With DIY wall decor like floating shelves, you can transform unused corners into functional and visually pleasing areas while keeping your space organized and clutter-free.
Declutter Your Closet – Create an Organized and Functional Space

Use this time to tackle the clutter in your closet and create an organized and functional space. Decluttering your closet not only helps you find what you need quickly but also creates a serene and peaceful environment. Follow these steps to achieve a perfectly organized closet that sparks joy:
- Start by sorting through your clothes and deciding what to keep, donate, or toss. Take each item and ask yourself if it still fits, if you love it, and if you’ve worn it in the past year. If the answer is no, it’s time to let it go. Keep only the clothes that make you feel confident and comfortable.
- Once you’ve decluttered, clean out your closet thoroughly. Wipe down shelves and vacuum or sweep the floor. A clean space sets the foundation for an organized closet.
- Group your clothes by season. This makes it easier to rotate your wardrobe and keeps your closet clutter-free. Store out-of-season clothing in labeled bins or vacuum-sealed bags to save space.
- Invest in storage solutions that suit your needs. Hanging racks, shelving units, and shoe organizers can maximize space and make items more accessible. Utilize the back of the closet door for hanging bags, scarves, or belts.
- Arrange your clothes in a way that makes sense to you. Organize them by category, color, or style. Use matching hangers to create a uniform look and maximize space.
- Label storage bins or use clear containers to store accessories like hats, gloves, and jewelry. This ensures everything has a designated spot and reduces clutter.
By decluttering and organizing your closet, you’ll have a streamlined space where you can easily find and enjoy your clothes. Say goodbye to the morning rush and hello to a stress-free morning routine.
“A cluttered closet is a reflection of a cluttered mind. Create an organized closet, and you’ll create a sense of order and peace in your everyday life.” – Unknown
Organize and Digitize Your Photos – Preserve and Display Your Memories

Don’t let your precious memories gather dust in old photo albums or get lost in the digital abyss. Now is the perfect time to organize and digitize your photos, ensuring they are preserved and easily accessible for years to come.
Whether you have boxes of nostalgic prints or countless digital files scattered across devices, it’s time to bring them all together in one cohesive system. Start by sorting your photos by date or event, creating a chronological order that will make it easier to find specific moments.
Consider digitizing your physical photos to protect them from damage or loss. Scanning each photo and saving it as a digital file allows you to create backups and share them with friends and family effortlessly. You can also edit and enhance the digital copies to bring out the best in your memories.
When organizing your digital photos, use a consistent file-naming convention and create folders to categorize them by year, special occasions, or themes. This will streamline the process of finding specific photos when you want to reminisce or create personalized gifts.
If you prefer a tangible representation of your photos, why not create your own DIY photo albums? Print your favorite memories and arrange them creatively in albums or scrapbooks. Adding captions, captions, and decorations can further personalize your albums, making them true keepsakes.
For those who prefer a digital approach, there are several software and online platforms available that allow you to create stunning digital photo albums. These platforms offer a wide range of customizable templates and features, allowing you to showcase your memories with just a few clicks.
Remember, organizing and digitizing your photos is not only about decluttering and preserving them but also about displaying and reliving them. Whether you choose physical albums or digital platforms, the goal is to give your memories the attention they deserve.
Take a trip down memory lane without the inconvenience of digging through boxes or scrolling endless folders on your computer. Organizing and digitizing your photos gives you the opportunity to relive those precious moments whenever you want.
By organizing, digitizing, and creating DIY photo albums, you can ensure that your memories are not only preserved but also easily accessible and beautifully displayed. Whether you opt for physical albums or digital platforms, the choice is yours. The important thing is to take action now and give your photo collection the love and attention it deserves.
Refresh Your Bookshelves – Rearrange and Revitalize Your Space

Transform your bookshelves into a focal point of your room by rearranging and revamping them. Bookshelves not only provide storage but also serve as a decorative element that can elevate the overall look of your space. With some creativity and thoughtful organization, you can turn your bookshelves into a showcase for your personal style.
Start by swapping out old books with new ones that reflect your current interests and tastes. Consider arranging them by color or size to create a visually appealing display. You can also mix in decorative objects such as vases, picture frames, or small sculptures to add depth and interest.
If you have a DIY spirit, why not create your own unique bookends or bookshelf decals? These personalized touches can make your bookshelves truly one-of-a-kind. Experiment with different arrangements and heights to create a sense of movement and balance.
Add a DIY Home Library
If you’re an avid reader, you may want to consider creating your own DIY home library. Dedicate one of your bookshelves to your favorite novels, classics, or special editions. Create a cozy reading nook nearby, complete with a comfortable chair and a soft blanket.
To enhance the ambiance of your home library, add some warm lighting and a subtle scent like lavender or vanilla. This will create a peaceful and inviting atmosphere, perfect for escaping into the world of your favorite books.
“A well-organized bookshelf is not only functional but also a reflection of your personality and interests.” – Rachel Smith
Creative Display Ideas
If you’re looking for creative ways to display more than just books, try incorporating unique items such as potted plants, framed art, or travel souvenirs. These personal touches can make your bookshelves feel like a curated gallery.
Experiment with open shelving, where you can showcase your favorite collections or treasured heirlooms. You can also use decorative boxes or baskets to neatly store smaller items while still displaying them in an aesthetically pleasing way.
Remember, there are no hard and fast rules when it comes to arranging your bookshelves. The goal is to create a visually appealing and functional space that reflects your personal style. So get creative, have fun, and let your bookshelves bring new life to your space!
Utilize Under-Sink Storage – Maximize Space in the Kitchen and Bathroom

Maximizing storage in the kitchen and bathroom can greatly improve organization and efficiency. One often overlooked area that provides ample storage potential is under the sink. With a few simple DIY storage solutions, you can transform this space into a clutter-free and functional area.
Under-sink storage is especially valuable in the kitchen, where cleaning supplies, dish soap, and other essential items tend to accumulate. By installing shelves or using storage bins, you can create designated spaces for different categories of items. This not only reduces clutter but also makes it easier to find what you need when you’re in the midst of cooking or cleaning.
In the bathroom, under-sink storage is ideal for keeping toiletries, extra towels, and other personal care items organized. Like in the kitchen, incorporating shelves or storage bins helps create designated spaces for different types of products. This ensures easy accessibility and eliminates the frustration of digging through a jumbled mess of items when you’re getting ready in the morning or preparing for bed.
One practical DIY storage solution for under the sink is to install adjustable shelves. These versatile shelves allow you to customize the storage space according to your needs. You can easily accommodate larger items by adjusting the height of the shelves, making it easier to fit bottles and containers of various sizes.
Another option is to use clear storage bins with labels. This makes it easy to see what’s inside each bin and quickly locate the items you need. Consider using stackable bins to maximize vertical space or drawers to keep smaller items organized.
To inspire and guide your under-sink organization project, take a look at the image below:
With a little creativity and the right storage solutions, under-sink storage can become a valuable asset in your kitchen and bathroom. By maximizing this often overlooked space, you’ll be able to declutter your surroundings and create a more organized and functional environment.
Transform Your Space with Lighting – Create the Perfect Ambiance

Lighting plays a crucial role in setting the mood and creating the desired ambiance in your home. Updating your light fixtures, replacing burnt-out bulbs, or adding new lamps can completely transform your space. With the right lighting choices, you can enhance the overall atmosphere and bring a touch of elegance to your home.
When considering lighting ideas, think about the overall theme and style of your space. Are you going for a cozy and inviting ambiance or a modern and sleek aesthetic? The lighting fixtures you choose should complement your decor and enhance the atmosphere you want to create.
Add DIY Light Fixtures
One way to customize your lighting is to create your own DIY light fixtures. This allows you to add a unique touch to your space and showcase your creativity. Upcycling old materials, such as mason jars or wine bottles, can result in stunning and eco-friendly light fixtures. Whether you’re into rustic, industrial, or bohemian styles, there are countless DIY light fixture ideas to suit your taste.
Create the Right Ambiance
Consider the type of ambiance you want to create in each room. For a warm and cozy feel, opt for warm yellow bulbs or soft, diffused lighting. These choices can create a welcoming and intimate atmosphere in living rooms, bedrooms, and dining areas. Additionally, installing dimmable lights allows you to adjust the intensity to suit different occasions and moods.
Combine Different Lighting Sources
Creating layers of light by combining different lighting sources can add depth and dimension to your space. Incorporate overhead lighting, task lighting, and accent lighting to achieve a balanced and visually appealing effect. Table lamps, floor lamps, and wall sconces can serve both functional and decorative purposes. By experimenting with different lighting combinations, you can highlight specific areas or objects and create focal points within your space.
By paying attention to lighting and incorporating these ideas into your home decor, you can create a warm and inviting ambiance that reflects your personal style. Let the right lighting transform your space into a cozy haven where you can relax and unwind.
Deep Clean Overlooked Areas – Refresh and Revitalize Your Home

When it comes to home maintenance, deep cleaning those often overlooked areas is essential for keeping your space fresh and rejuvenated. By tackling these cleaning projects, you can ensure a sparkling clean home and create a healthier environment for you and your family.
Rugs and Carpets
Start your deep cleaning journey by giving your rugs and carpets some much-needed attention. Vacuum thoroughly to remove dirt, dust, and allergens trapped in the fibers. For a more thorough clean, consider renting a carpet cleaner or hiring professionals to steam clean your carpets. Removing stains and deep cleaning your carpets will not only refresh their appearance but also extend their lifespan.
Under the Bed
Don’t neglect the space under your bed during your deep cleaning session. Dust, allergens, and even forgotten items can accumulate under the bed over time. Take the opportunity to vacuum or sweep this area and organize any items that have been gathering dust. Not only will this contribute to better air quality in your bedroom, but it will also provide a clutter-free and peaceful sleep environment.
Tile Grout
Refresh the look of your tiled areas by cleaning the grout. Over time, grout can accumulate dirt, mold, and stains, causing your tiles to look dull and dirty. Scrub the grout lines with a mixture of water and vinegar, or use a specialized grout cleaner for more stubborn stains. A clean and bright grout will instantly revitalize the appearance of your tiled floors, walls, or backsplashes.
Refrigerator and Appliances
While you may clean the visible surfaces of your refrigerator and appliances regularly, it’s important not to forget the hidden parts. Remove all the contents from your fridge, including shelves and drawers, and clean them with warm, soapy water. Wipe down the interior walls and surfaces, paying special attention to any spills or stains. Additionally, clean the coils at the back of your refrigerator to ensure optimal performance and energy efficiency.
Remember to extend your deep cleaning efforts to other appliances as well. Dust and dirt can accumulate on the vents of your dishwasher, microwave, and oven, affecting their performance. Wipe down these appliances and use appropriate cleaning products to remove grime or residue. By giving your appliances a thorough cleaning, you can improve their efficiency and prolong their lifespan.
So, set aside some time for deep cleaning those overlooked areas in your home. From rugs and carpets to under the bed, tile grout, and even your refrigerator and other appliances, a deep clean will refresh and revitalize your space, making it more comfortable and inviting for you and your loved ones.
Redefine Your Wall Design – Create a Statement with Unique Ideas

When it comes to transforming the look and feel of a room, don’t forget about your walls. Redoing your wall design can make a big impact and add personality to your space. Whether you want to create a bold accent wall or experiment with unique painting techniques, there are plenty of DIY options to explore. Let’s explore some creative ideas to redefine your wall design and make a statement.
Create an Accent Wall
An accent wall is a great way to add visual interest to a room and create a focal point. Choose a wall that you want to highlight and consider using bold colors or unique patterns. Whether you opt for a vibrant shade or a subtle texture, an accent wall can elevate the overall look of your space and make it stand out.
DIY Wall Art
Add a personal touch to your walls by creating your own DIY wall art. From canvas paintings to framed prints, there are endless possibilities to express your creativity. Experiment with different mediums and techniques to create unique and original pieces that reflect your style. Hang your artwork strategically to enhance the visual appeal of your space.
Experiment with Creative Painting Techniques
Take your wall design to the next level by experimenting with creative painting techniques. Consider techniques such as ombre, stenciling, or geometric patterns to add depth and texture to your walls. These techniques can create a distinctive look and give your space a one-of-a-kind charm.
“By redefining your wall design, you can transform a dull space into a captivating and personalized area.”
Gallery Walls
Create a gallery wall to showcase your favorite photos, artwork, and memorabilia. Mix and match different frame styles and sizes to create a visually appealing display. This is a great way to add a personal touch to your space and tell a story through your wall design.
Hand-Painted Murals
If you’re feeling adventurous, consider creating a hand-painted mural on one of your walls. This can be a large-scale artwork or a simple design that adds character to your space. Choose a theme that resonates with you and let your imagination run wild. Hand-painted murals can be a show-stopping feature that sets your space apart.
With these unique ideas, you can redefine your wall design and create a statement that reflects your style and personality. Whether you choose to create an accent wall, experiment with painting techniques, or showcase your own DIY wall art, let your walls be a canvas for your creativity.
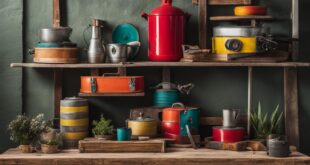
Add Unique Touches – DIY Crafts and Upcycles

Add a personal touch to your home with the art of DIY crafts and upcycles. These projects are not only a fun way to spend your time but also allow you to add character and charm to your living space. Get your creative juices flowing and think outside the box to incorporate unique touches that reflect your style and personality.
One DIY project idea is creating beautiful flowers out of egg cartons. By cutting and painting the individual sections of the carton, you can transform them into colorful blooms that can be used as decorations or even in floral arrangements. Let your imagination run wild as you play with different colors and shapes to create a stunning floral display.
Another upcycling idea is repurposing old glass jars. These versatile containers can be transformed into candle holders, storage jars, or even mini terrariums. Add a coat of paint, decorate them with ribbons or lace, and you’ll have unique pieces that not only serve a practical purpose but also add a touch of charm to your home decor.
When it comes to DIY crafts and upcycles, the possibilities are truly endless. From transforming old furniture with a fresh coat of paint to repurposing vintage items into completely new and functional pieces, the choice is yours. Let your creativity soar and experiment with different materials, techniques, and styles to create personalized touches that make your space truly one-of-a-kind.
Incorporate Stylish Storage – Functional and Decorative Solutions

When it comes to home organization, stylish storage solutions are a game-changer. Not only do they help you keep your space clutter-free, but they also add a touch of elegance and charm to any room. Whether you’re looking to optimize space in a small apartment or create a visually appealing storage system for your belongings, these storage ideas and DIY projects are here to inspire you.
One of the easiest ways to incorporate stylish storage is by using baskets, bins, and decorative boxes. These versatile storage containers not only keep your items neatly organized but also add a decorative touch to your shelves, countertops, or closets. Choose containers that match your home decor and use them to store anything from books and magazines to toys and accessories.
For those who need more storage space, consider incorporating furniture with built-in storage. Bookshelves with hidden compartments or ottomans that double as storage boxes are great options for maximizing space while maintaining a clean and stylish aesthetic. These functional pieces will not only provide ample storage for your belongings but also add an extra element of design to your home.
Creating a cohesive and aesthetically pleasing storage system doesn’t have to be a daunting task. By combining functionality and decorative organization, you can transform any room into a clutter-free and visually appealing space. Explore these stylish storage solutions and unleash your creativity to design a home that is both functional and beautiful.
Embrace Creativity – DIY Art and Decor Projects
Unleash your creativity and embark on exciting DIY art projects and home decor crafts to infuse your space with personalized artwork and creative expression. By taking the time to engage in hands-on artistic endeavors, you can add a unique touch to your home while experiencing the joy of self-expression.
Explore various mediums, from painting and drawing to sculpture and collage, to discover the artistic techniques that resonate with you. Experiment with different styles and themes to create artwork that reflects your individuality and enhances the aesthetic appeal of your surroundings.
Not only do DIY art projects allow you to showcase your creative abilities, but they also offer opportunities for customization. Personalize your artwork by incorporating meaningful symbols, colors, or quotes, ensuring that each piece holds sentimental value.
Additionally, embrace the versatility of DIY art by using your creations as focal points in your home decor. Frame your artwork or display it on shelves, mantels, or gallery walls to curate a visually captivating space that showcases your unique artistic prowess.